
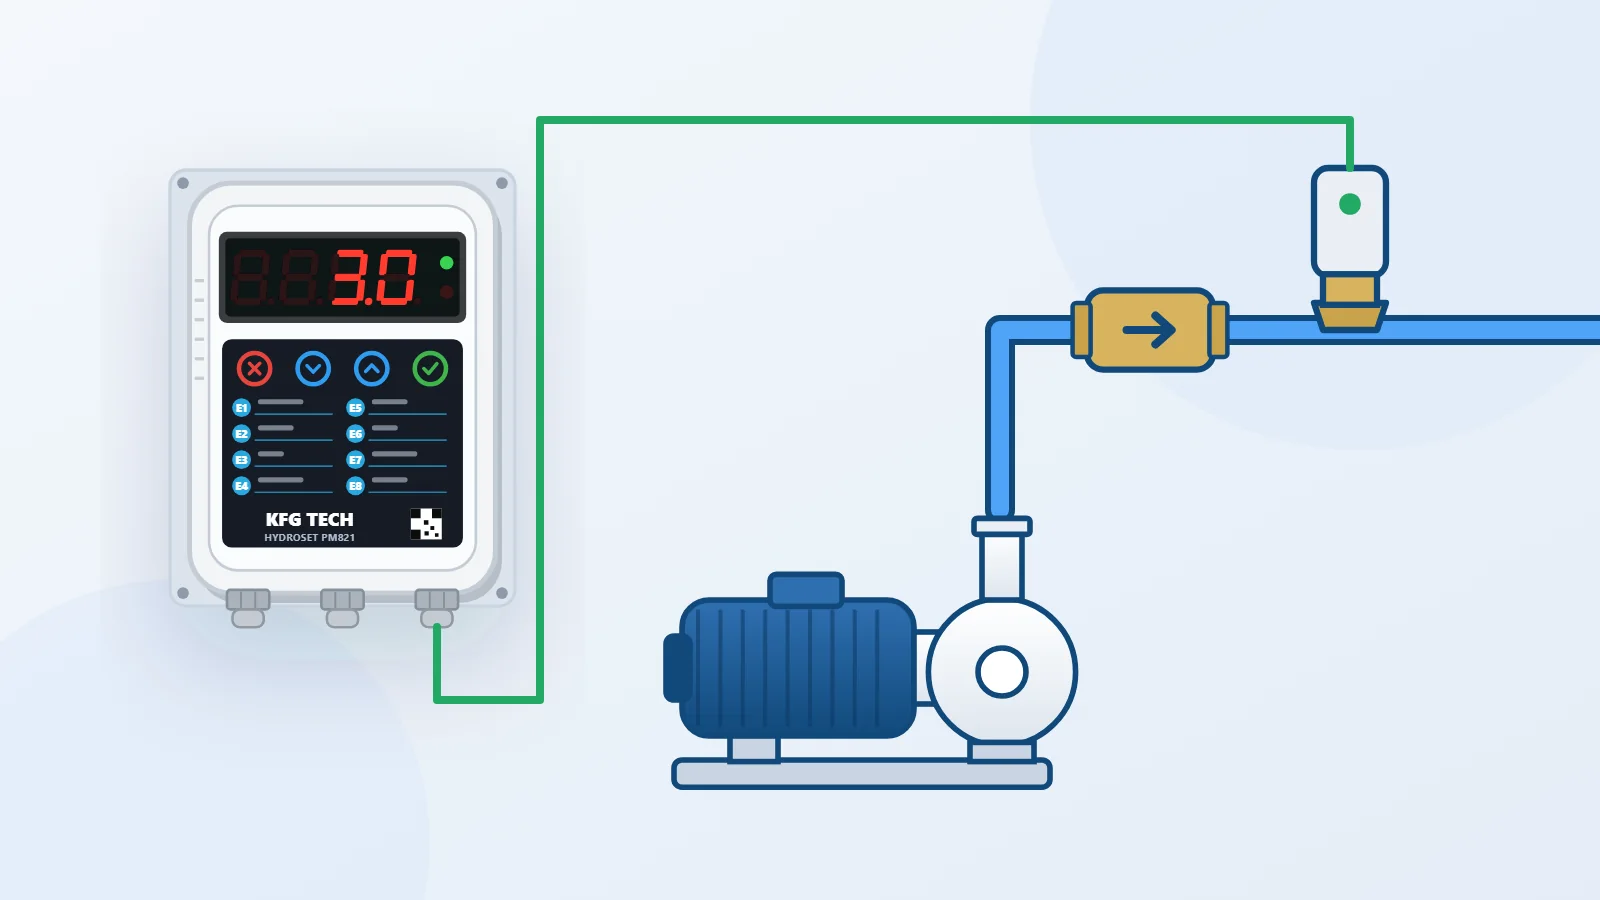
Installing a pump controller takes four steps: mounting, the pressure sensor, the pipework and the wiring. Then a five-step start-up sets F1, F2, F3 and F4, with the formula for the right pressure.
Installing a pump controller takes four jobs: choosing where to mount it, fitting the pressure sensor, correcting the pipework, and the wiring. After that a five-step start-up sets four parameters — F1, F2, F3 and F4. This guide follows the same order as the HYDROSET PM821 manual.
Where to mount the unit
Mount the unit somewhere you can reach it, and where there is ventilation so the unit stays cool. Keep it out of direct sunlight; the permitted operating temperature is −15 to 55 °C. Poor ventilation causes fault E8.
- Drill two holes with a 3.5 mm bit, 3 cm deep.
- Screw the wall bracket to the wall.
- Place the unit on the bracket.
Fitting the pressure sensor
The pressure sensor screws in where the pressure switch sat on the five-way manifold. Its thread is G1/4 female.
- Fit the sensor after the check valve. Fitted before it, the pressure reads wrong and fault E4 follows.
- The sensor cable is fixed. Before tightening, turn the sensor backwards a few turns and then screw it in, so the cable does not twist.
- There is a green light on the back of the sensor. It being lit means the sensor is sound.
If that light is off, the sensor or its cable has failed — which is what fault E6 reports.
Pipework
- Fit the check valve at the pump outlet, before the manifold.
- Leave at least 15 cm between the pump outlet and the check valve.
- Fit no elbow or bend within 50 cm of the pump outlet.
- If there is a bypass line, make sure its valve is sound. A bypass valve that looks closed but leaks keeps the pressure from ever reaching the set value, and the unit reports a low-pressure fault.
Take no branch off the pipe between the pump outlet and the check valve.
Wiring
The unit has separate terminals for input and output, and each wire carries a label showing whether it goes to the pump or to the mains.
- Read the label beside each wire.
- Connect the output wire to the pump terminal.
- Connect the input wire to the mains last.
The quality of the connections affects how the unit works. Push the wires fully into the terminal and tighten the terminal screw. A loose connection causes heating, a voltage drop and faults — a loose terminal is one of the common causes of fault E2.
If the output drives a contactor, the pump current does not pass through the unit and current-based dry-run detection will not work. Set F4 to 0 and detect dry running by pressure (F10).
Start-up in five steps
- Power the unit. It shows its name and prepares for about 30 seconds; the pump does not start during that time.
- Set F1 and F2. The calculation is in the next section.
- Leave one tap open so the pump keeps running. Read the pump current with the Down key and store that figure, plus at least 0.5 A, in F3.
- Close the pump inlet valve and wait a moment. The current now shown is the dry-running current; store it, plus at least 0.5 A, in F4. Then open the inlet valve again.
- Leave the settings with the Cancel key. The unit is ready.
F4 must stay below the pump's normal working current, otherwise the unit reads normal running as dry running.
How to work out the right pressure
The right pressure depends on the height of the building. Measure the height in metres from where the pump sits to the highest tap. Two formulas are enough:
- F1 = (building height ÷ 10) + 2
- F2 = F1 − 1.5
Every 10 m of height needs 1 bar, and the 2 is the pressure wanted at the highest tap.
| Building height | Suggested F1 | Suggested F2 |
|---|---|---|
| 10 m (3 floors) | 3.0 bar | 1.5 bar |
| 15 m (5 floors) | 3.5 bar | 2.0 bar |
| 20 m (7 floors) | 4.0 bar | 2.5 bar |
| 30 m (10 floors) | 5.0 bar | 3.5 bar |
Avoid more pressure than is needed. High pressure damages the solenoid valves in washing machines and dishwashers and shortens the life of the fittings.
The pump must be able to reach the F1 pressure, or it never stops. A simple rule: the pump head on the nameplate must exceed the building height plus 20 m.
Maintenance
The unit needs no scheduled maintenance. Every few months, check the installation for dust and ventilation and make sure the terminals have not worked loose.
After installation
If the unit shows a fault code, the list of fault codes gives the cause and the steps for all eight. The full installation text, the fifteen parameters F1 to F15 and the specifications are in the user manual. To pick a model from the pump's nameplate current, the model selection guide has the matching table.